Wall Model Pet Door Installation
NOTE: These instructions are written for wood or metal stud framed wall installation. Your Hale Pet Door™ “wall model” can also be installed in any brick or block wall construction and with exterior brick, stucco, or siding. If you need technical assistance with these types of installations, please call the above number.
A SAFETY REMINDER!
Always wear eye protection and gloves when appropriate.
Step 1: Before installation, be sure that you have the proper size pet door for your pet. If in doubt larger is better. It may be harmful for your pet to use a pet door that is too small. A good general rule is to install the pet door so that the distance from the floor to the top of the passage opening is even or above the shoulder of your largest pet. Remember that there will be a short tunnel for your pet to navigate. You don’t want them to have to crawl through or hunch over as this can hurt an animal’s hips.
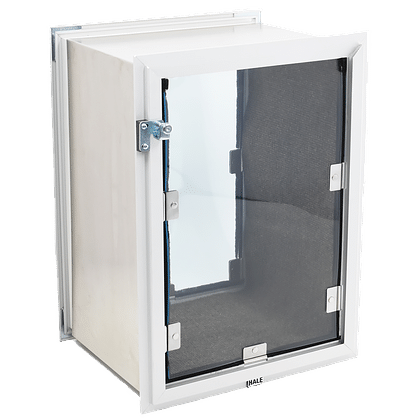
Step 2: Take a brief look at the large illustration of the wall model and become familiar with various components of the pet door wall model. This will not only help in understanding the terms used in these instructions but can be very useful should you need to call for technical support.
Step 3: Check the package you received to make sure that it contains all the necessary parts.
Complete Kit includes:
Instructions
Warranty
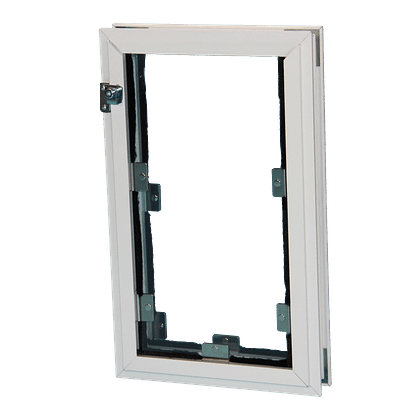
Hale Pet Door™ wall model (includes inner frame with attached tunnel and outer frame)
Olefin nylon carpet
King Starboard® Security Cover
Flashing
Raincap included but use is optional
5/8” #6 Phillips Head Screws
7/64” drill bit
Tools you may need: (will vary depending on the type of wall into which you are installing the pet door)
| Drop Cloths Circular saw with wood or masonry blade Drywall saw Electric drill 5/16” masonry bit 24” level Blue masking tape |
Caulking Caulk gun Tin snips Stud finder Pencil Tape measure Reciprocating saw |
 Step 4: Find a suitable area for your wall model. Most wall models have a vertical lifting security cover (side loaded cover models are available as needed). Make sure the area has no obstructions to hinder the removal of this cover. For installation in a framed wall, try to place the pet door between studs; a stud finder makes finding stud locations easy. Mark the stud locations and if possible, center the pet door between the studs. Look at the preferred location from both the inside and outside of the wall for signs that wiring, cable or plumbing may be inside the wall. Keep in mind upstairs bathrooms may have plumbing in the lower level walls. Step 4: Find a suitable area for your wall model. Most wall models have a vertical lifting security cover (side loaded cover models are available as needed). Make sure the area has no obstructions to hinder the removal of this cover. For installation in a framed wall, try to place the pet door between studs; a stud finder makes finding stud locations easy. Mark the stud locations and if possible, center the pet door between the studs. Look at the preferred location from both the inside and outside of the wall for signs that wiring, cable or plumbing may be inside the wall. Keep in mind upstairs bathrooms may have plumbing in the lower level walls.
CAUTION: Cutting a power line leading to an outlet or light switch or hitting a plumbing pipe with power tools can result in severe injury or death. If you have any doubts about installation placement or about your skill level in tackling this project, please call us or contact a professional in your area.
Putting down drop cloths before you start makes cleanup easier. NOTE: You may wish to reverse steps 6 and 7. Pencil marks can be difficult to remove from walls and you may wish to cut a small hole in the wall to check for obstructions before you draw the entire pattern. Step 6: Draw a pattern on the inside wall according to your pet door size with a pencil. Wall openings are listed below according to pet door size. For special size pet doors the opening may be determined by measuring the tunnel. Make sure your opening is square and level. |
|
 |
Step 7: Open a small hole somewhere near the center of the drawn pattern on the inside wall as shown below in the drawing or at the bottom of the area as shown in the picture. Shine a flashlight through the opening and look for obstructions within the wall. The small opening is much easier to patch should obstructions be found. If nothing is seen or if the insulation is blocking your view, you may reach inside the wall and feel for obstructions that may not have been seen.
 |
Step 8: If the wall area is clear then you may proceed to cut the inside wall within the drawn pattern; a drywall saw is most generally used on the inside. Push the insulation up into the wall above and/or beside the rough opening. You may wish to replace the cut out piece of sheetrock back into the rough opening temporarily and lean the pet door against it to hold it in place. This will help prevent dust being blown into the house when you cut the exterior wall.
 |
Step 9: Proceed with the wall cutout by drilling completely through the outer wall from the inside at each corner of the cutout pattern. A long drill bit may be required to do this. (A 12” long drill bit can usually be purchased for $4-$8 to help with this.) Be sure the drill is held straight so that the inner and outer holes are drilled in-line. If you have exterior brick or stucco walls, be sure to use a masonry bit rather than the same bit you used on the interior wall.
 |
 |
Step 10: On the outside wall, find the reference holes you drilled in Step 9 and draw your square on the wall. Again, measure carefully and make sure the exterior opening is both square and level and in line with the interior opening you previously cut. |
| Step 11: Drill out two corners diagonal from each other (top left and bottom right OR top right and bottom left). Depending on the construction of the wall you may want to use a 7/8” flat blade boring bit (for wood surfaces) or a 5/16” regular bit. If you use a 5/16” bit, drill three holes close together (shown below) then wiggle the bit until you have connected the three holes. This will allow you enough room to get a reciprocating saw blade into the holes. (You can also drill the holes on all four corners if desired, to make it easier to cut down and across with the reciprocating saw rather than sawing upwards.) |
 
Step 12: After the holes (from Step 11) are connected, use a reciprocating saw to cut out the rough opening along the marked lines. If you do not have a reciprocating saw, you can use a key saw or circular saw to start the hole and a hand saw to cut out the entire rough opening. If you are cautious, a circular saw can be used on the outside wall. Use the proper blade for the circular saw depending on the type of outside material being cut.
|

 Step 13: Place the inside frame with attached tunnel through the wall cutout. From the outside, reach through the opening and hold the inside frame tight against the wall. Mark the tunnel with a pencil along the outside wall on all sides as shown.
Hold pet door tightly against interior wall and mark with pencil from exterior to get correct tunnel depth.
|
Step 14: Remove the interior pet door frame and tunnel from the hole. Carefully cut the tunnel along the pencil mark with metal snips to make the tunnel the correct depth for your wall. Be cautious when cutting metal so you don’t accidentally cut yourself on the removed piece. Discard the metal strip that you have cut off the tunnel. |
| Step 15: The “Flashing” is a thin piece of aluminum with three flanges. Caulk the flashing with a latex caulking as follows: Apply two large beads on the bottom approximately ½” from the rear and another generous bead on the bottom and sides approximately 1” from the front. Apply a bead on the outside of both vertical flanges at the front. The bottom predrilled holes of the outer frame should sit directly above the bottom front bead of caulking when it is installed. (You should be drilling through the bead of caulk when the door is installed.)
|

Caulk the flashing before inserting into exterior hole |
| Step 16: Place the flashing into the bottom of the wall opening. The flashing should have the two side flanges pointing upward and the outside flange downward and against the outside wall as shown. | |
 |
Step 17: Insert the inside frame and tunnel back into the opening. From the outside, pull the inside door frame tightly against the inside wall and push the flashing snug against the outside wall.
 |

 Optional Step: The raincap attachment is a Hale exclusive design to aid in water containment and diversion. If your pet door is being installed in a protected area (i.e. indoors between two rooms, under a covered porch, etc.) you may omit this step. The raincap is designed to keep water out of the pet door itself and is not required for installation. If you choose to use the raincap for your wall installation, attach it as shown in the graphic and picture to the left. It should simply hook onto the top of the outer frame.
Step 18: Sleeve the outside frame into the tunnel. With both pet door frames firmly pulled against their respective walls, drill two more holes through the tunnel and bottom flashing using the supplied 7/64” drill bit and the existing pre-drilled holes (in the outer frame) as guides. Insert supplied screws into the drilled holes. Next, drill holes in the sides of the tunnel again using the pre-drill holes (in the outer frame) as a guide. The number of side screws varies with the size of pet door.

 Step 19: Drill two holes through the bottom of the tunnel evenly spaced and approximately 2″ to 2 ½” back from the inside of the outer frame using the supplied 7/64” drill bit. Insert the 5/8” #6 screws provided and tighten to attach the flashing to the tunnel.

| Step 20: Use a caulking sealer between the outside frame and the outside wall at the top and both sides. DO NOT CAULK AT THE BOTTOM OF THE OUTSIDE FRAME. This will restrict the drainage of moisture should any accumulate inside the pet door. You may also caulk around the whole perimeter of the inner frame, if desired, although this is not required. You may wish to outline the door with blue masking tape before you caulk to make a cleaner caulk line and to make cleanup easier. If you do decide to use the tape, allow the caulk to dry for a few minutes before you remove the tape. |  |
| Step 21: Measure the width of the tunnel between the door frames and mark this measurement on the back of the carpet. Trim the included carpet to the correct width to cover the distance between the door frames. You may wish to dry fit the carpet into the tunnel to verify the width before using adhesive. NOTE: The carpet length has been precut for each size of door so you should not have to trim the length. After making sure the carpet is cut correctly, install it into the tunnel using a common construction glue to keep the carpet in place. DO NOT use silicone to attach the carpet as the odor will not dissipate as it is trapped between the flaps. To make it easier to install the carpet in the tunnel when the adhesive has been applied, use a caulk gun to apply the adhesive directly to the sides and bottom of the tunnel. Roll the two ends of the carpet inwards and set into the bottom of the tunnel. Carefully unroll one side of the carpet and press firmly to the side of the tunnel and the adhesive. Press the carpet tightly into the bottom corner of the tunnel. Push the carpet against the bottom of the tunnel and work it into the other bottom corner. Finally, unroll the second side of the carpet and press it firmly against the other side of the tunnel. | |
 |
 |
 Step 22: If you ordered a translucent gray Lexan® security cover for your pet door, peel the protective covering from the cover and set it aside for a couple of hours before installing it into the front frame. A drying period will prevent the inner flap from sticking to the newly uncovered Lexan®. If you ordered any color of the King Starboard® security cover, there will be no protective covering over it but you still may wish to let your door set without the security cover in place for a few hours to avoid any sticking. The cover will slide easily into place in the built in frame and can be easily locked and unlocked with the positive action pin bolt lock.
| Installing the standard top loading security cover. It can also be ordered side-loading. |
Step 23: If desired, you can place the wall pieces you removed in the pet door box to keep them in good condition for possible future use. They can usually be used to patch the wall if you ever need to remove the pet door.
Step 24: Remove the drop cloths and clean up the area. You may use any standard window cleaner to wipe down the flaps and remove any fingerprints or residue from the installation.
 |
| YOUR INSTALLATION IS NOW COMPLETE. WE SINCERELY HOPE YOU AND YOUR PETS ENJOY THE FREEDOM PROVIDED BY YOUR HALE PET DOOR FOR MANY YEARS TO COME. |
 |


 Studs in an exterior wall should be 16″ on center, giving you 14″ of room between studs.
 Step 5: Lay down drop cloths on both sides of the wall where you will be installing your pet door to make for easier cleanup after installation. You may also wish to tape the interior drop cloth to the baseboard with blue masking tape. This will help prevent any debris from falling into the crack between the drop cloth and the carpet.
 For example, we recommend using a diamond blade to cut through stucco. There is no need, nor is it advisable, to frame the inside of the wall cutout. The Hale Pet Door™ “Wall Model” is completely self-framing. After the opening is cut from the outside, remove the interior piece of sheetrock from the inside hole.
