


OptiView Window Model Pet Door Installation — for Vertical or Horizontal Applications
Please read these instructions carefully and completely before attempting to install Hale Pet Doors; they will guide you through the steps and precautions needed for a window installation. To reach an experienced installer for free consultation, please call 1-888-293-6411. Hale Pet Doors are designed for ease of installation and are ideal for most sliding windows. It is important to note however, that the product warranty may be affected if returns have been modified in any way other than specified by these instructions.
A SAFETY REMINDER!
Always wear eye protection and gloves when appropriate.
 Step 1: Before installation, be sure that you have the proper size pet door for your pet. If in doubt larger is better. It may be harmful for your pet to use a pet door that is too small. However, with a window installation, the size of the pet door will be limited by the size of the window opening. Make sure that this application will work for your pet and your window before ordering. Otherwise, a different application may be better.
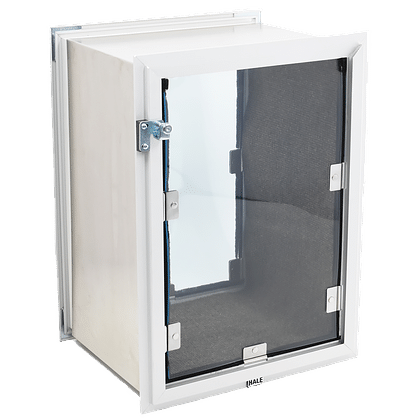
Step 2: Take a brief look at the large illustration of the Hale OptiView Window™ model and become familiar with various components of the pet door window model. This will not only help in understanding the terms used in these instructions but can be very useful should you need to call for technical support.
Step 3: Check the package you received to make sure it contains all the necessary parts.
Complete Kit includes:
Instructions
Warranty
Vinyl weather-stripping
King Starboard® or Lexan® security cover
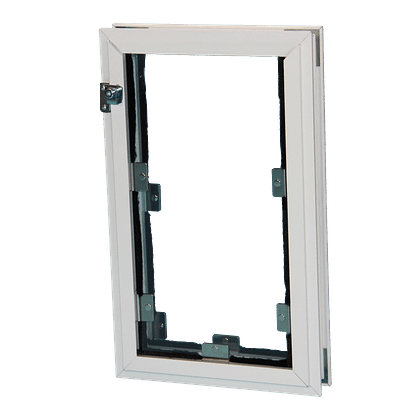
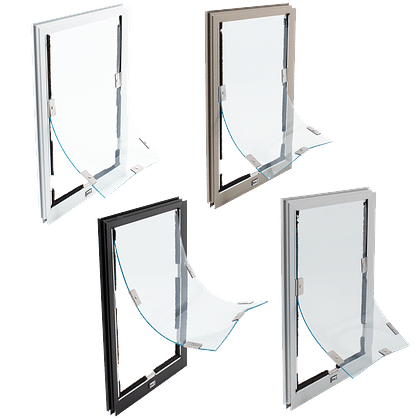
Hale OptiView Window™ model pet door (horizontal or vertical model—custom made to the customer’s previously supplied measurements—single pane or double pane depending on window)
Tools you may need: Screwdriver Drill Tape measure Foam tape
Step 4: The customer or you should have previously measured the window width and opening height when ordering the pet door. Measure both the window and the pet door you received to make sure that everything will fit.
Step 5: Clean both sides of the glass window panes. There will be some overlap of the window panes (figure 1) when you are finished installing the window insert. This is nearly impossible to clean later without removing the pet door insert, so cleaning it before installation will save time and trouble.
Step 6: Slide open the window (either horizontally or vertically depending on which model you are installing) and carefully place the pet door either under or beside the sliding window section.
Step 7: Slide one end of the pet door window unit into the window track.
Step 8: Adjust the window insert downwards for vertical sliding windows or sideways for horizontal sliding windows until it is properly positioned in the window track.
Step 9: Loosen the screws in the adjustment strip and push the adjustment outwards until it engages the window frame. Retighten the screws. The pet door should now be held securely in the window track.
Step 10: Close the window down on top (vertical window) or up against the side (horizontal window) of the pet door and inspect for gaps. Fill any gaps with foam tape. (not included) (figures 2 and 3)
Step 11: Decide where you would like to place the vinyl weather-stripping. For a vertically opening window, place vinyl weather-stripping on the top edge of the opening window or the bottom edge of the stationary window to seal the gap created by overlapping glass. For a horizontally opening window, place vinyl weather- stripping on the inside back edge of the opening window or the outside front edge of the stationary window to seal the gap created by overlapping glass. (figures 2 and 3) Thoroughly clean the area that you have chosen. Cut the vinyl weather-stripping to the proper length with scissors. Remove the protective paper from the adhesive area and press firmly into position.
Step 12: If you so desire, you can put a screw or two through the window frame to prevent the window from being opened. Be very careful that you don’t drill into glass! If you hit the window pane with either the tip of the drill bit or a screw, it will shatter. The glass in the pet door comes all the way to the edge of the frame, so don’t try to drill into the pet door frame at all.
Step 13: If you ordered a translucent gray Lexan® security cover for your pet door, peel the protective covering from the cover and set it aside for a couple of hours before installing it into the front frame. A drying period will prevent the inner flap from sticking to the newly uncovered Lexan®. If you ordered any color of the King Starboard® security cover, there will be no protective covering over it but you still may wish to let your door set without the security cover in place for a few hours to avoid any sticking. The cover will slide easily into place in the built in frame and can be easily locked and unlocked with the positive action pin bolt lock. Depending on the window model ordered, there may be a “removal slot” cut into the edge of the security cover to enable the cover to be removed. In that case, slide the cover along the track until you can tip the cover out of the track.
Step 14: Clean up the area and you are finished.

