Replacement Flaps and Pet Door Parts Installation Instructions
 Replacement Flap Kits (instructions for replacing individual parts are listed below this section)
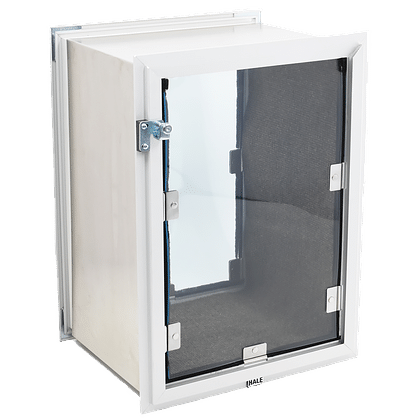
The replacement flap kit should contain the following parts:
7/64″ drill bit
Replacement screws
1 or 2 flaps, depending upon kit ordered
Replacement black nylon weather-stripping
Replacement magnets (number depends on flap size ordered)
Tools you will need: Screwdriver Mallet Pliers Drill
Make sure the flap is the correct one for the door. Please check the flap size and magnet locations. If both an interior and exterior flap were ordered, make sure they are oriented correctly. If something does not look right, please call us before proceeding further. 1-888-293-6411.
Step 1: Remove the screws at the top of the old flap and pull down on the flap to remove it from the frame.
Step 2: While the flap is out, replace the black weather-stripping if needed. Grasp the old weather-stripping by the aluminum holder with a pair of pliers. Wiggle the pliers a little to loosen the holder and pull it out. Alternately, you can use a mallet and screwdriver to tap the weather-stripping out of the frame. Place the new piece of weather-stripping in the channel and tap in with a screwdriver handle.
Step 3: Insert the new flap into the top channel where the old flap was removed. The metal bar at the top should be facing the screw holes. Please note: the metal bar is riveted to the flap. What look like screw holes on the metal bar are simply rivets. They are not meant to line up with the screw holes.
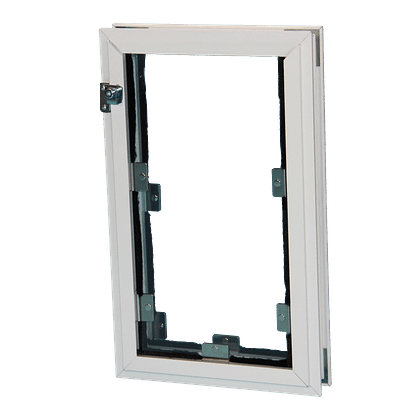
Step 4: The magnets are pressure fitted into the frame and can be replaced if necessary. They are adjustable by prying out with a screwdriver or pliers or by tapping in with a standard screwdriver and mallet. Replace magnets, if desired, and tap or twist into the proper position in relation to the flap.
Step 5:Before drilling, adjust flap alignment so that the strikes align with the magnets and the flap is level and swings freely.

Step 6: Using the screw holes as a guide, drill a short distance into the metal bar on top of the new flap with the 7/64″ drill bit. Insert the new screws into the holes and tighten.
 Flaps
Flaps
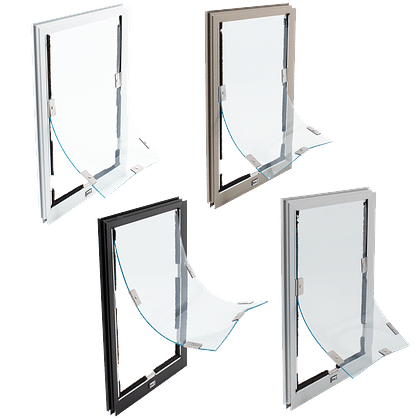
Install the flap by inserting it into the top frame. Make adjustments and drill screw holes at the top then insert screws. Adjust magnets one last time.
 Magnets
Use a screwdriver and mallet to tap out the magnets (from the inside of the frame). Be careful not to mark the frame of the pet door. Insert new magnets and tap with the handle of a screwdriver. Adjust by tapping or twisting a screwdriver under the magnets, again do this from the inside of the frame. See the screen model instructions for photos of magnet adjustment if needed.
 Strikes
Simply place the strike over the edge of the flap in the desired location with the barbed prongs facing inwards, making sure the location chosen lines up exactly with the magnets in the door frame. Carefully using pliers, compress the sides of the strike towards each other, pressing the barbs firmly into the flap vinyl.
 Black Nylon Weather-Stripping
Use a screwdriver and mallet to tap out weather-stripping from the inside of the frame being careful not to mark the frame of the pet door. Insert new weather-stripping and tap in with the handle of a screwdriver.
 Gray Nylon Weather-Stripping
Slide weather-stripping out of the metal channel. Replace with new weather-stripping by sliding it into the channel. You may wish to carefully pull it through the channel with needle nose pliers.
 Vinyl Weather-Stripping
If vinyl weather-stripping was applied to the door or window, it can be easily replaced with a new strip. Simply cut the vinyl to the correct length, peel off the green protective strip and press firmly to attach to correct location.
 Thermal Bond Packet
At the top of an Omni panel or Omni window insert extension, remove the previous thermal bond strips (if necessary). In the new packet, there are two small pieces of Thermal Bond rubber seal. Peel apart the various layers of the new thermal bond as needed for the depth of your door and fill in the gap at the top of the extension.
 Pin Bolt Lock
Remove screws holding the lock. Place new lock in correct location with black pad between the lock and the door frame and replace screws.
 Carpet
Measure the inside of the tunnel and cut the carpet to the correct width. If needed, you can also trim it to the correct length to cover the sides and bottom of the tunnel. Use any construction adhesive to adhere the carpeting to the tunnel. Inexpensive latex caulking also works quite well for this purpose.
 Standard Panel Door Lock
Remove screws holding lock – replace with new lock and provided screws then adjust.
 Standard Panel Locking Strip
Measure the height of the leading edge of the panel of the sliding glass door that closes against the Hale Standard Panel™ and cut to length. Hold locking strip into position against the leading edge of the patio door. BE EXTREMELY CAREFUL NOT TO TOUCH THE GLASS PANE WITH THE END OF THE DRILL BIT. Drill through the locking strip and set screws. Be sure the strip is turned the correct way so the lock attached to the pet door panel properly clamps onto the locking strip.
 Omni Panel Lock Bar
Choose an area approximately halfway up the patio door. Clean the area inside the door channel and the back of the door and make sure they are dry. Mark the vertical door channel and the back edge of the sliding door for the placement of the lock bar. Peel the protective paper from the double side tape on the back of the lock bar. Make sure the thumb release is aligned upwards and press the lock bar into the door channel. Peel the paper backing off the receiver and press it firmly onto the back of the sliding door.
 Cover
Cover
The cover can be replaced by simply sliding a new cover into the tracks on the inside frame of the pet door. Optional side load and exterior security covers are also available but may require track adjustment depending on the customer’s original installation.
 Training Flap
The training flap can be temporarily used in place of the regular flaps. However, it does not provide any weather proofing or sealing capabilities. Install the training flap as you would any other replacement flap following the instructions above.
 Raincap
If a raincap needs to be retrofitted to an existing wall or door model pet door, remove the screws inside the pet door which hold the outer frame to the inner frame or tunnel. If the outer frame was previously caulked to protect against water intrusion, remove the caulking material. Remove the exterior frame and attach the raincap to the top edge of the frame. On newer models, there is a channel for the raincap to slip into. It will still work on our older model pet doors but this channel is not there and the raincap will be held in place with the lip of the raincap and the exterior surface of the door or wall. Reinstall the exterior frame as normal and if it is being used for an outdoor application, recaulk the top and sides of the pet door frame. DO NOT caulk across the bottom!
 Tunnel (shown riveted to interior frame)
If you would like to retrofit a door model into a wall model, attach a tunnel between the frames. When you receive the tunnel, it will be appear to be “bent”. The corners of the tunnel are intentionally “over bent” to provide a tight seal against the exterior frame when attached during installation. Do not attempt to straighten the tunnel. Using rivets (or screws if rivets are not available), attach the tunnel to the interior pet door frame. The number of rivets needed will depend on the size of pet door being adapted but there should always be at least two on each side. Make sure one rivet on the top goes through both layers of tunnel metal to give added strength and stability to the tunnel. Silicone all four sides of the tunnel where it meets the inner frame. After placing the pet door in the opening and cutting the tunnel down to the correct depth, attach the outer frame with screws. For more details, see the wall installation instruction section.
 Screen Stabilizer Kit
To install the spreader bar onto the screen door, push the aluminum clips into each end of the spreader bar. Directly above the pet door, carefully pull a small length of screen spline out of the spline raceway on the screen door. The spreader bar is generally installed on the side of the screen mesh opposite the spline. Slide the curved portion of the clips onto the metal raceway edge and carefully push the spline back into place, using the pressure from the spline to hold the metal clip firmly against the screen frame. Slide the retainers over the top edge of the pet door spline frame near each top corner and drill holes into the spreader bar. Attach the retainers to the spreader bar with screws. If desired, see the screen model installation section for a detailed graphic to assist with installation.


