

RAMP INSTALLATION INSTRUCTIONS
Thank you for your purchase of a Hale Pet Door™ ramp. We are sure that you will get years of use and that it will add to your pet’s quality of life.
Please read these installation instructions carefully as the attachment can vary greatly depending on where the ramp is being installed. Photos and illustrations have been added to help our customers understand various instructions. To reach an experienced installer for free consultation, please call toll free 800-646-4773. Any person with a basic working knowledge of tools or construction can install a pet ramp. It is important to note however, that the product warranty may be affected if returns have been modified in any way other than specified by these instructions. If you have questions or problems, please call us or contact a professional in your area.
A SAFETY REMINDER!
Always wear eye protection and gloves when appropriate.
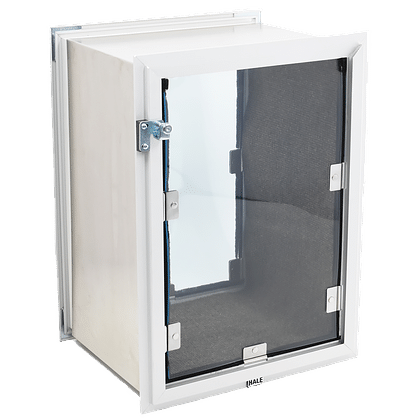
Step 1: Before installation, make sure you have the proper size ramp for your pet, your pet door, and your installation location. Use the graphic below to help acquaint yourself with the components of your ramp and the terminology used in these installation instructions. (NOTE: Not all ramps include a landing or a foot, these are options you may have chosen when you ordered your pet door.)

Step 2: Check the package you received to make sure it contains all the necessary parts.
Instructions
Warranty
Hale Pet Ramp
Olefin carpet (may be preattached to ramp surface)
Hardware packet (contents may vary depending on your wall surface or installation location)
Tool you may need: (will vary depending on the type of wall or location into which you are installing the ramp)
Drill and appropriate drill bit for application
Screwdriver
Drop Cloth
Stud Finder
Level
Pencil
Tape Measure
 Step 3: If possible, make sure the installation location has a fairly level surface. If you are installing your ramp in an exterior location, you do not want the ramp to “rock” on uneven ground.
Step 4: Decide on the exact height placement for your ramp. Most ramps come with a 3” attachment area and our standard rises are 3”. 6”. 12”. 18”. and 24”. These can generally be adjusted slightly to match the correct height installation for your pet door. The ramp should ideally be placed directly under the bottom outside frame of the pet door or 1-2” below this frame. Make sure your dog does not have to jump to get through the pet door. See picture to the left for the optimum height placement of a ramp.
Step 5: When you ordered your ramp, you choose whether you wanted it to attach from the end or the side. (see graphic below)
 After determining the exact height placement for your ramp, mark on your wall where the ramp will be positioned and where in the attachment area the anchors will be located. We encourage installation of the ramp into the sill plate, a stud or other sturdy location to make the ramp installation more secure. This is especially important with our larger ramps that will be used by heavier dogs. Mark the bolt locations on the ramp attachment area as well. As a general rule, if you are attaching your ramp by the end, you will use two anchors. If you are attaching your ramp through the side reinforcement area, you will use three anchors.
Step 6: Depending on the type of wall material you will be installing into, drill holes in the marked locations of the ramp and the wall.
Step 7: Use the chart below to help determine the correct type of attachment hardware for your installation location.
| Location / Surface Type | Attachment Hardware |
| Interior Wall / Drywall | 2” toggle screws |
| Exterior Framed Wall / Stucco Finish | 3” lag screws and masonry plugs |
| Exterior Framed Wall / Brick Exterior | 3” lag screws and masonry plugs |
| Exterior Framed Wall / Siding Finish | 3” lag screws |
| Exterior Brick Wall | 3” lag screws and masonry plugs |
| Exterior Block Wall | 3” lag screws and masonry plugs |
| Hale Security Barrier | 2” lag screws or 2” bolts with nuts & washers |
Step 8: Using the holes you have predrilled, securely attach your ramp to your wall location. Make sure it is snug against the wall and does not “rock” back and forth on the ground.
Step 9: Your installation is now complete. You may need to introduce your dog to his new ramp and train him to use it just as you did with the pet door.

WE SINCERELY HOPE YOU AND YOUR PETS ENJOY THE FREEDOM AND EASE OF ACCESS PROVIDED BY YOUR HALE PET RAMP FOR MANY YEARS TO COME.
Installation of Pet Ramp with Self Standing Option
You may have chosen the self standing option when you purchased your pet ramp. This ramp is designed to be set next to furniture such as a couch or a bed and stand freely. It can also be set inside the house under a window or in another location where you do not want a permanent installation. However, it can also be utilized in exterior situations and can be attached to the exterior house wall just as a standard ramp.
Installation of Pet Ramp with Railing Option
 If you chose the railing option when you ordered your pet door, you may have a railing above the ramp surface on one or both sides of your ramp. Depending on your location and if you are attaching your ramp from the side or the end, you may be able to attach your ramp perpendicular to the wall through this railing. Otherwise, follow the instructions above for a standard ramp installation.
Ramp at right shown with both self standing option and railing option.
Installation of Pet Ramp with Customer Provided Carpet
If you chose to install your ramp with your own carpet and did not choose to send that carpet to our factory for pre-installation. Use a high quality carpet adhesive to initially attach the carpet to the starboard surface of the ramp. Screw through the carpet into the starboard at all the edges to ensure it adheres properly and does not come detached from your ramp. Then proceed with the installation instructions as above for a standard Hale Pet Ramp.
